A Scenario can be created using the following button in the toolbar in the Scenario Directory:
A pop-up window then opens in which the properties of the Scenario can be defined:
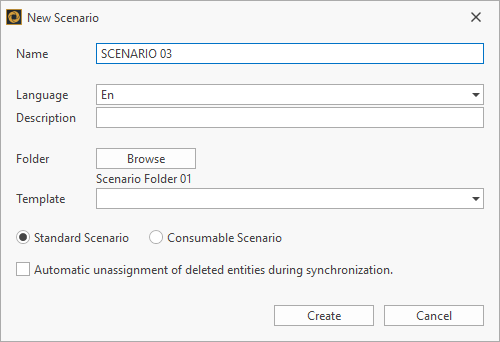
The properties that can be defined have the following meaning:
|
Property |
Explanation |
|---|---|
|
Name |
Define the language-independent technical name of the scenario. |
|
Language & Description |
Define the language-dependent description considering the selected language |
|
Folder |
Define in which folder the Scenario should be located if the correct folder has not been selected in advance. |
|
Template |
Select a Scenario Template on which the new scenario should be based. |
|
Scenario Type |
Select the Scenario type (standard vs. consumable) to determine whether it should be consumable and thus reusable in other standard scenarios. |
|
Automatic Unassignment |
Select this setting to enable automatic unassignment during synchronization in order to automate the Scenario Maintenance. |
Once all properties have been defined and specified, the scenario can be created via "Create".
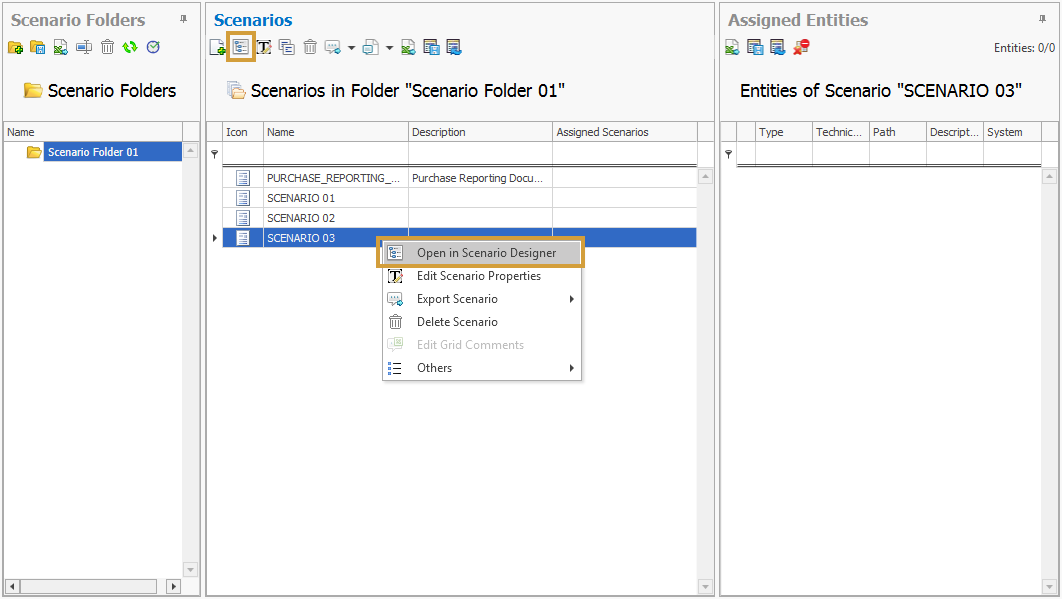
In the next step, the Scenario can be opened with a double click, the context menu, or the toolbar in the Scenario Designer in order to adjust the structure, assign objects or scenarios, and comment elements: